
Cluster Optimization
Learn how to analyze your cluster, apply automated optimization policies, and reduce costs step by step.
Analyze the current resource usage of your cluster and apply automated optimization policies to reduce costs. You can efficiently reconfigure resources through policy-based settings and workload analysis.
Cluster Optimization
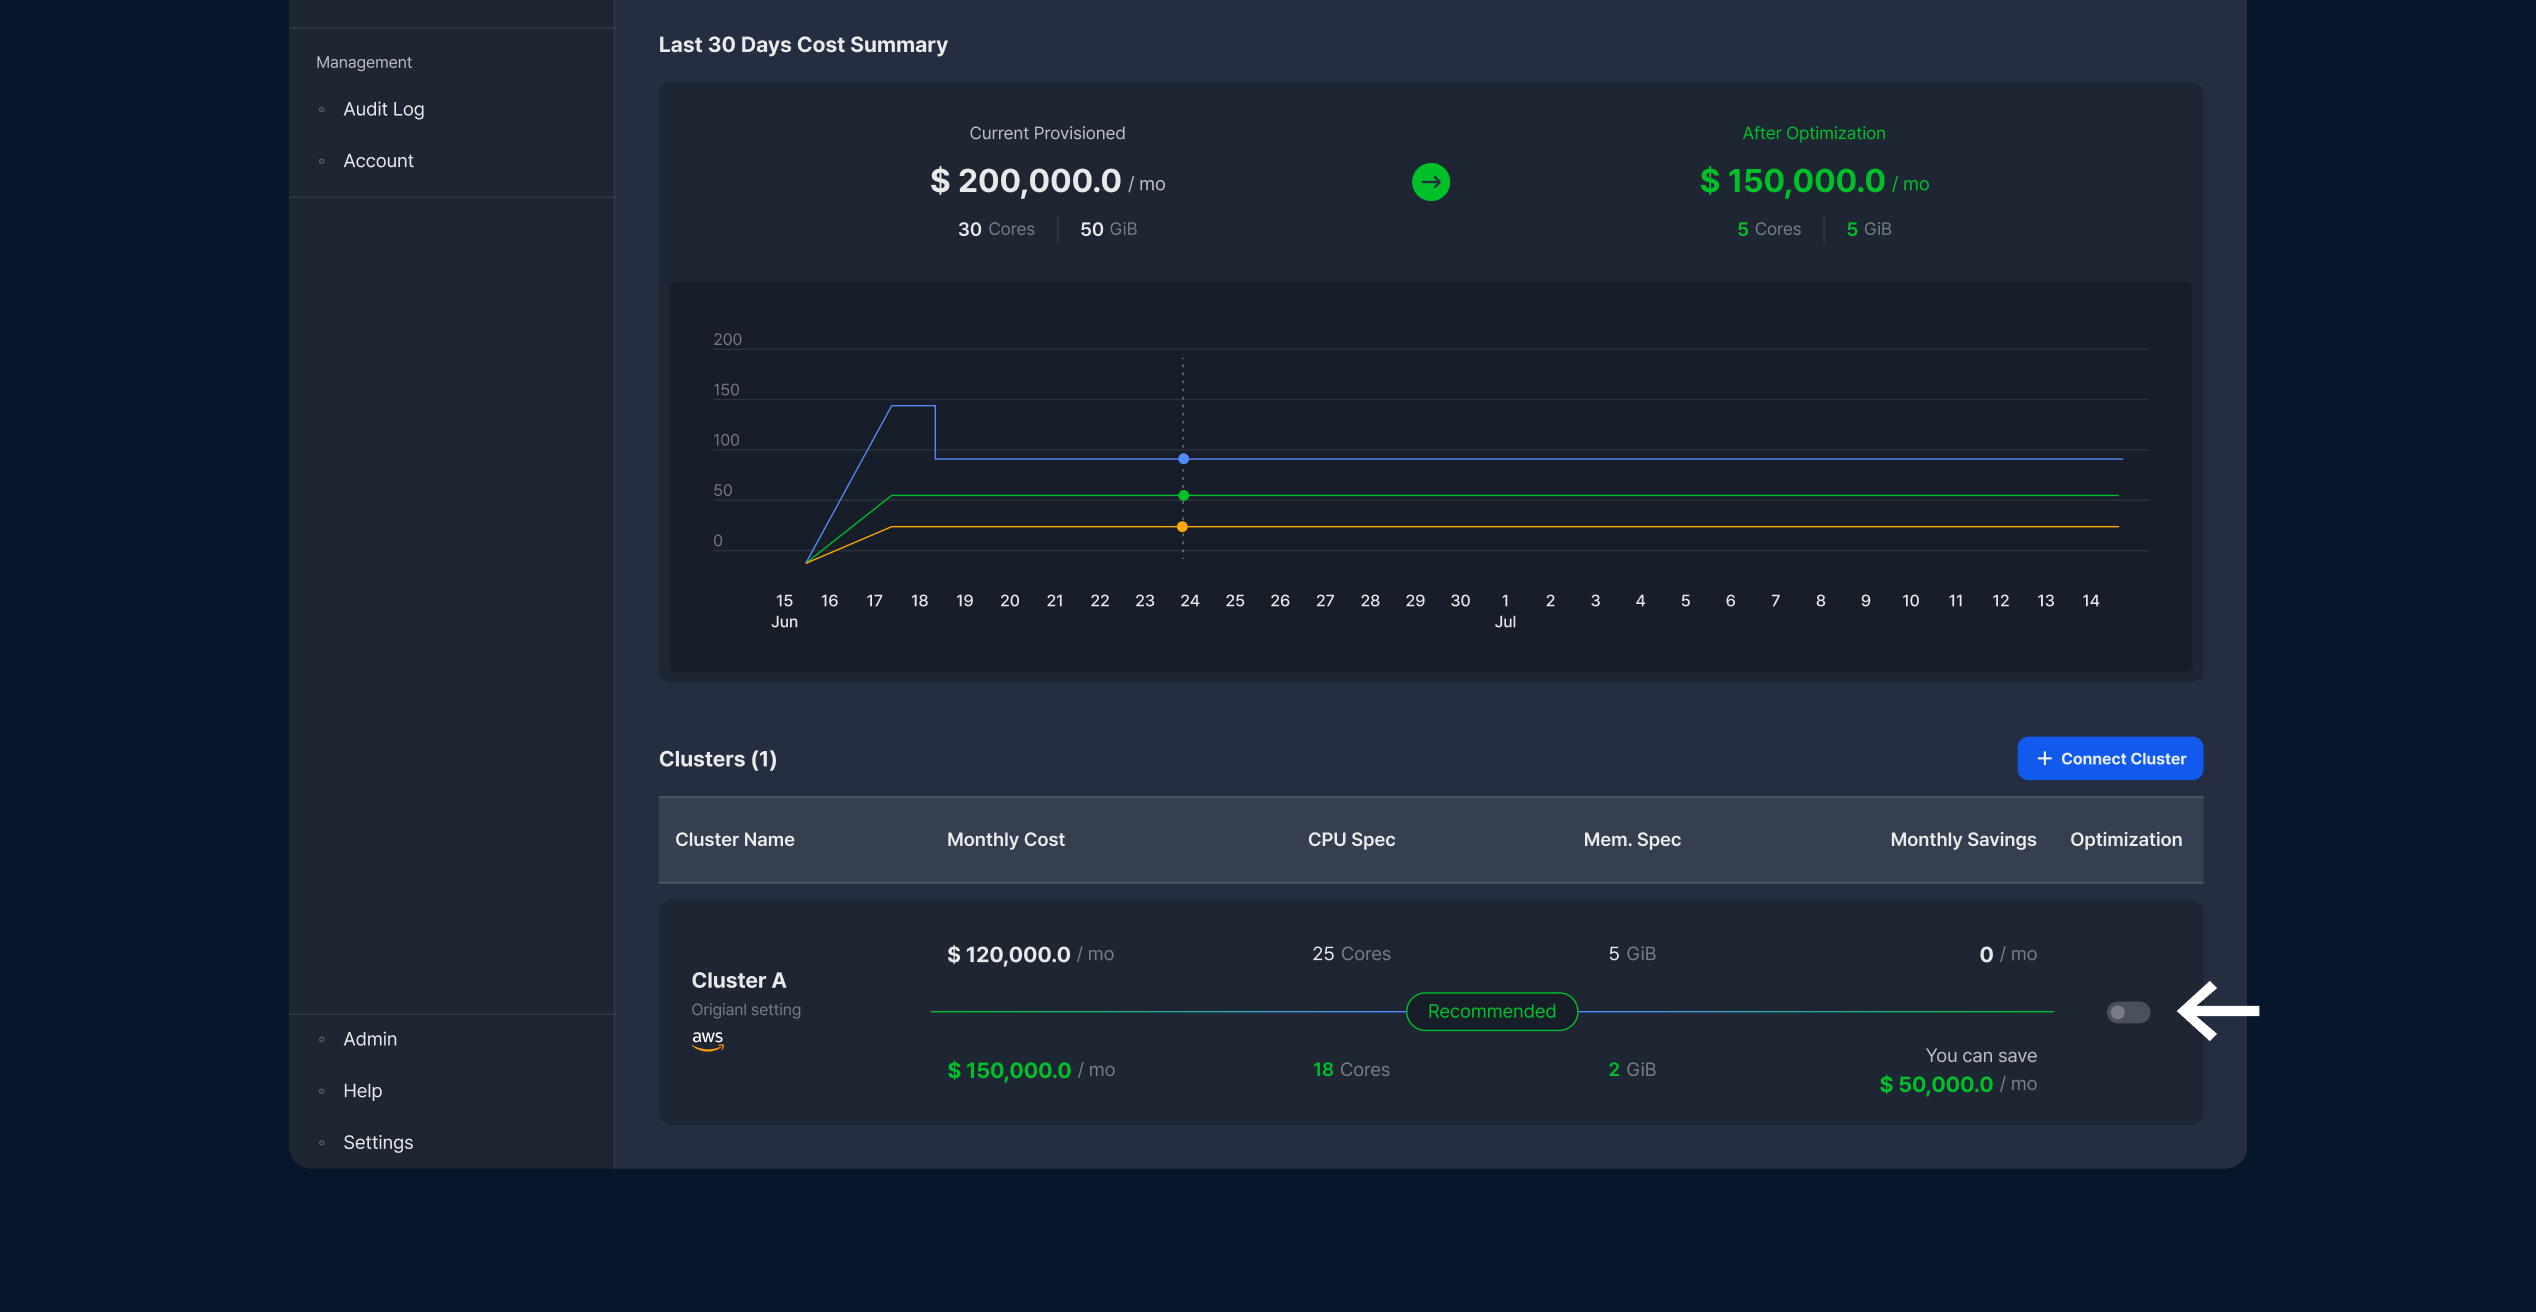
Step 1. Turn On Optimization Toggle
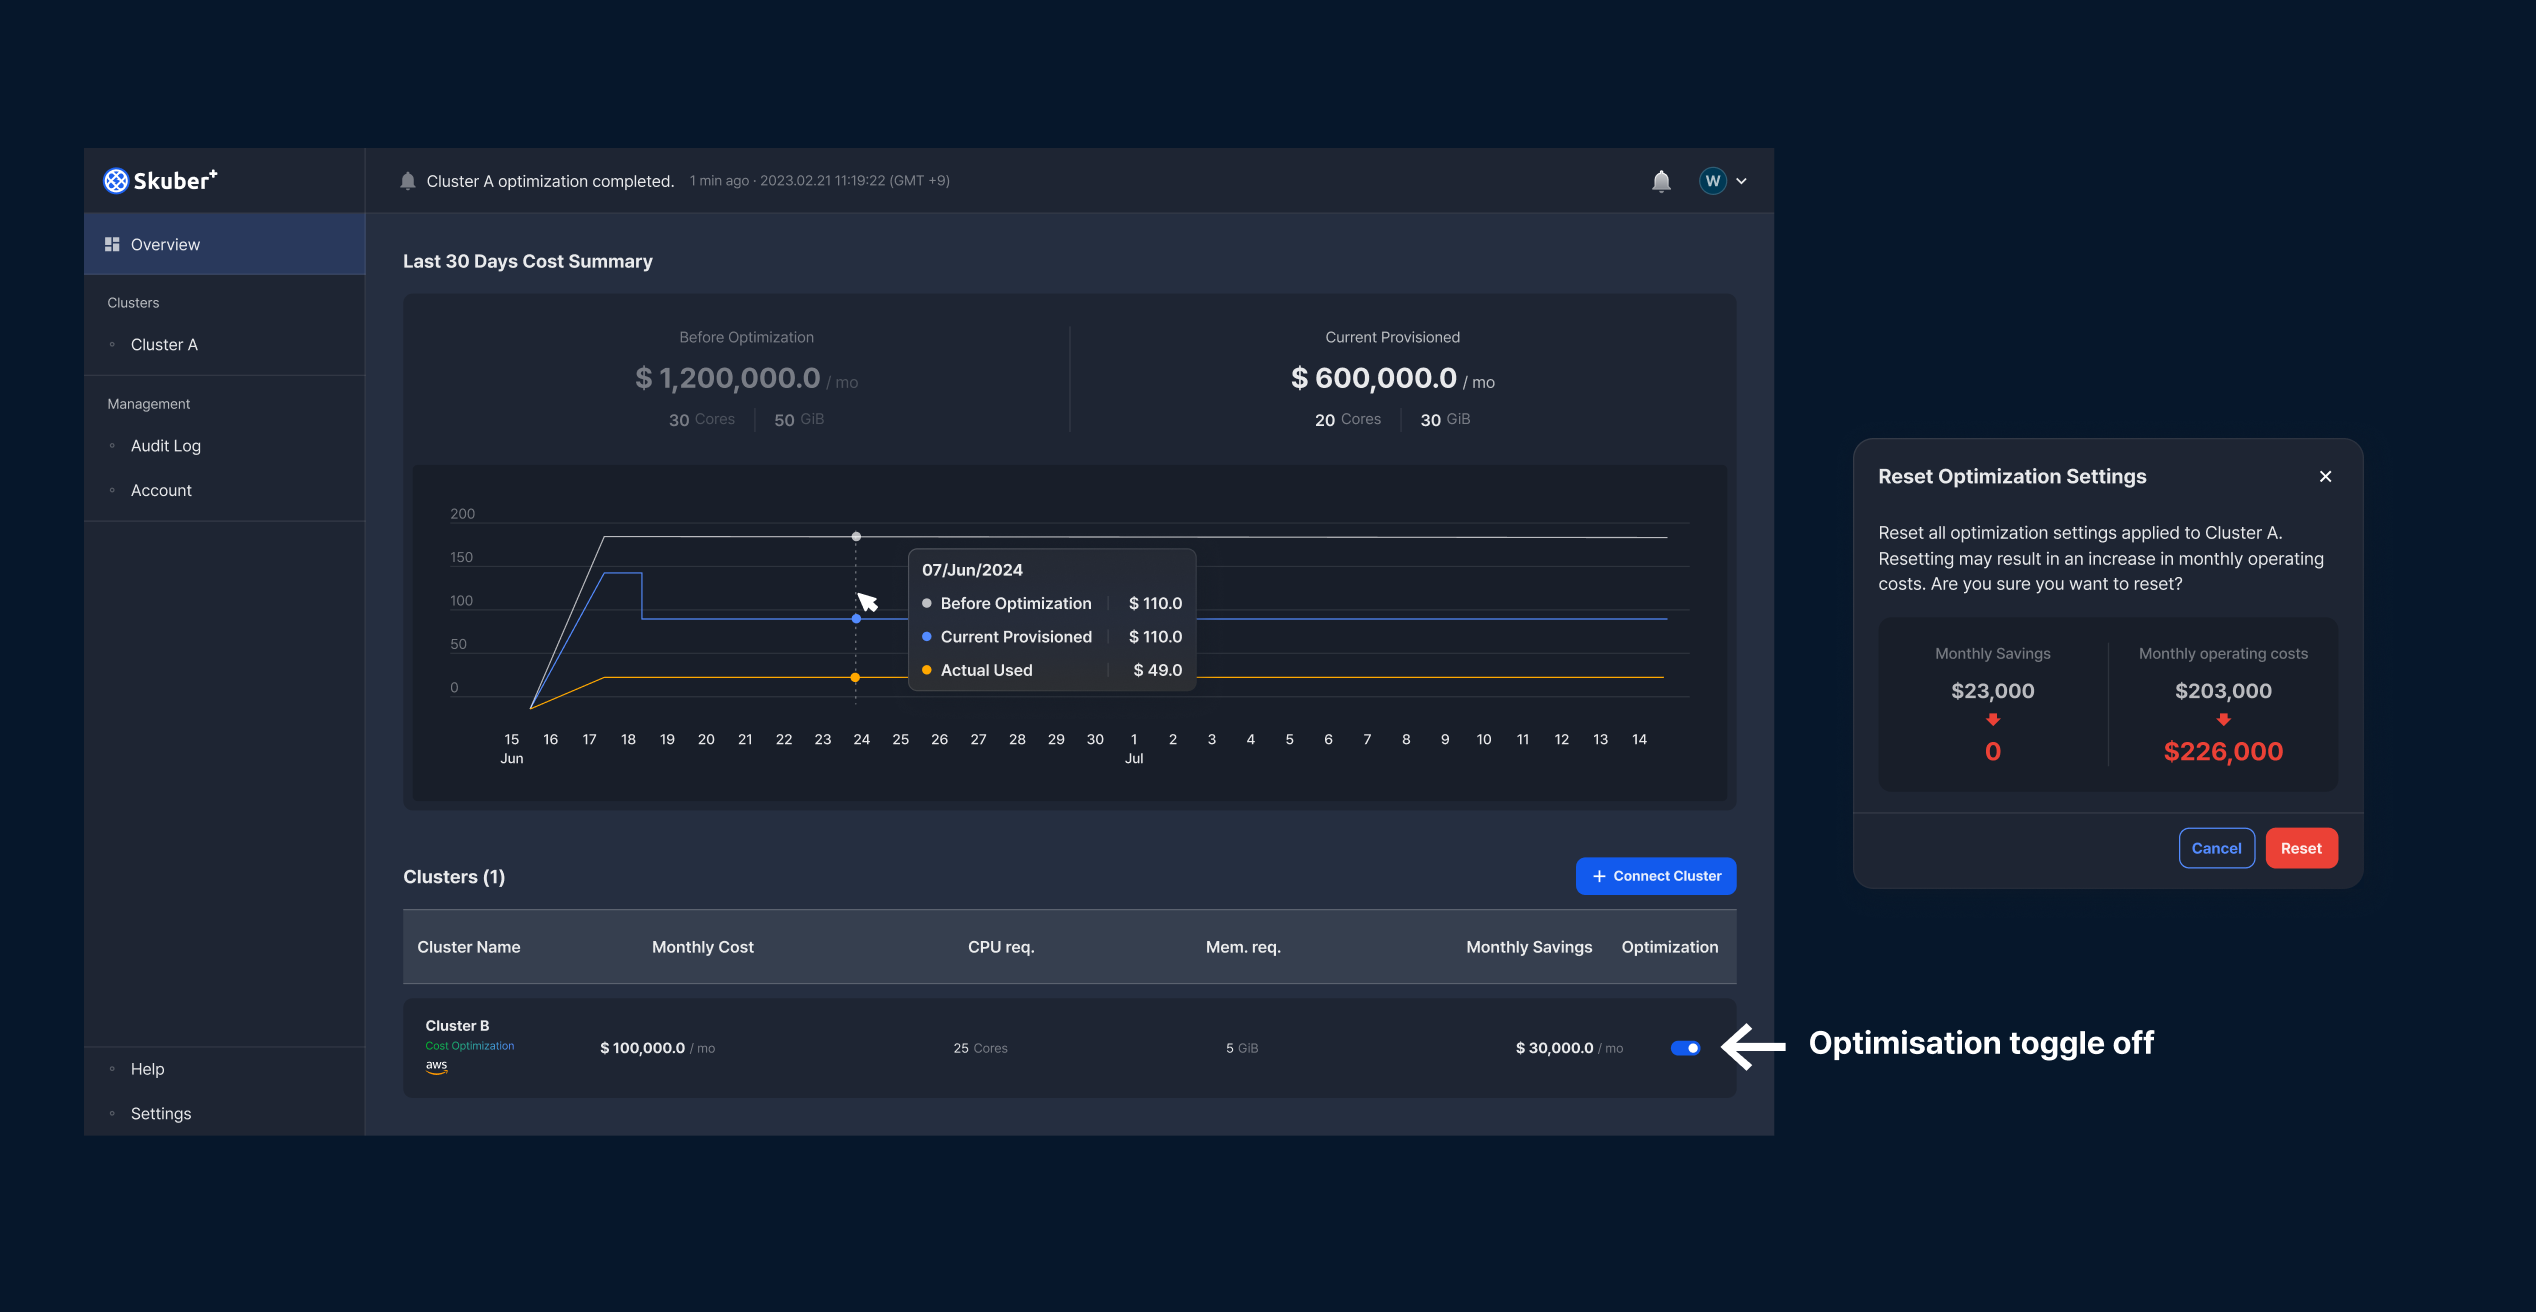
When the optimization toggle is activated, Skuber+ begins analyzing the cluster environment.
If there are any pre-installed open-source cost optimization tools, they must be removed first to ensure accurate analysis.
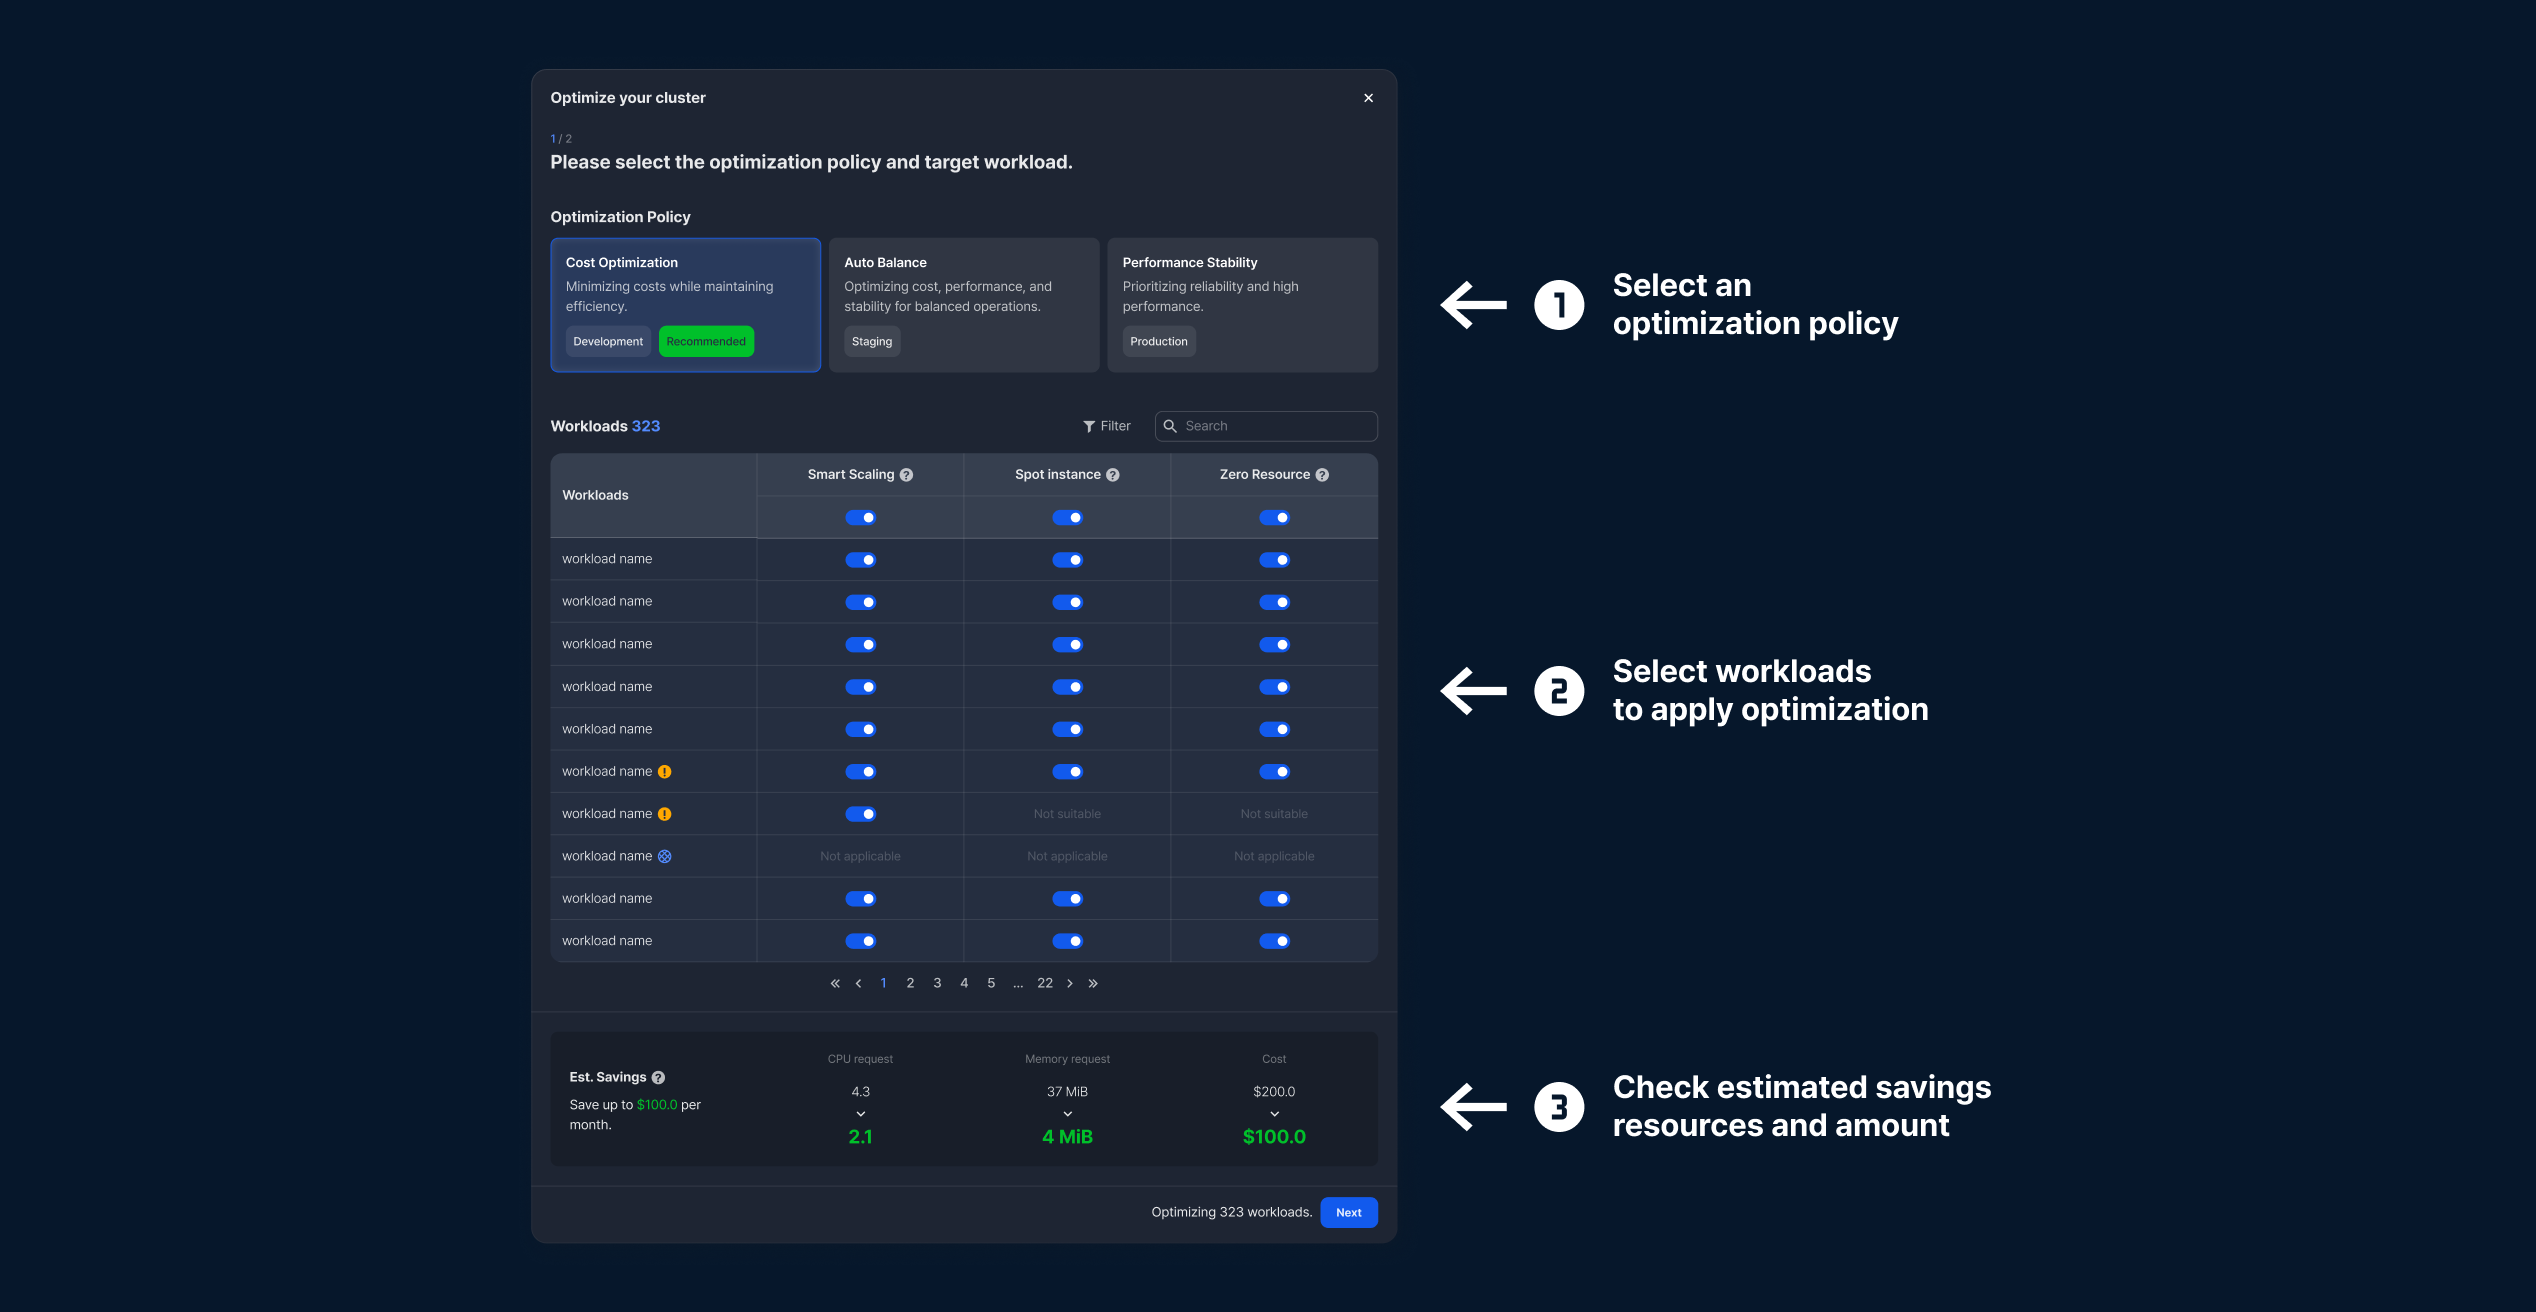
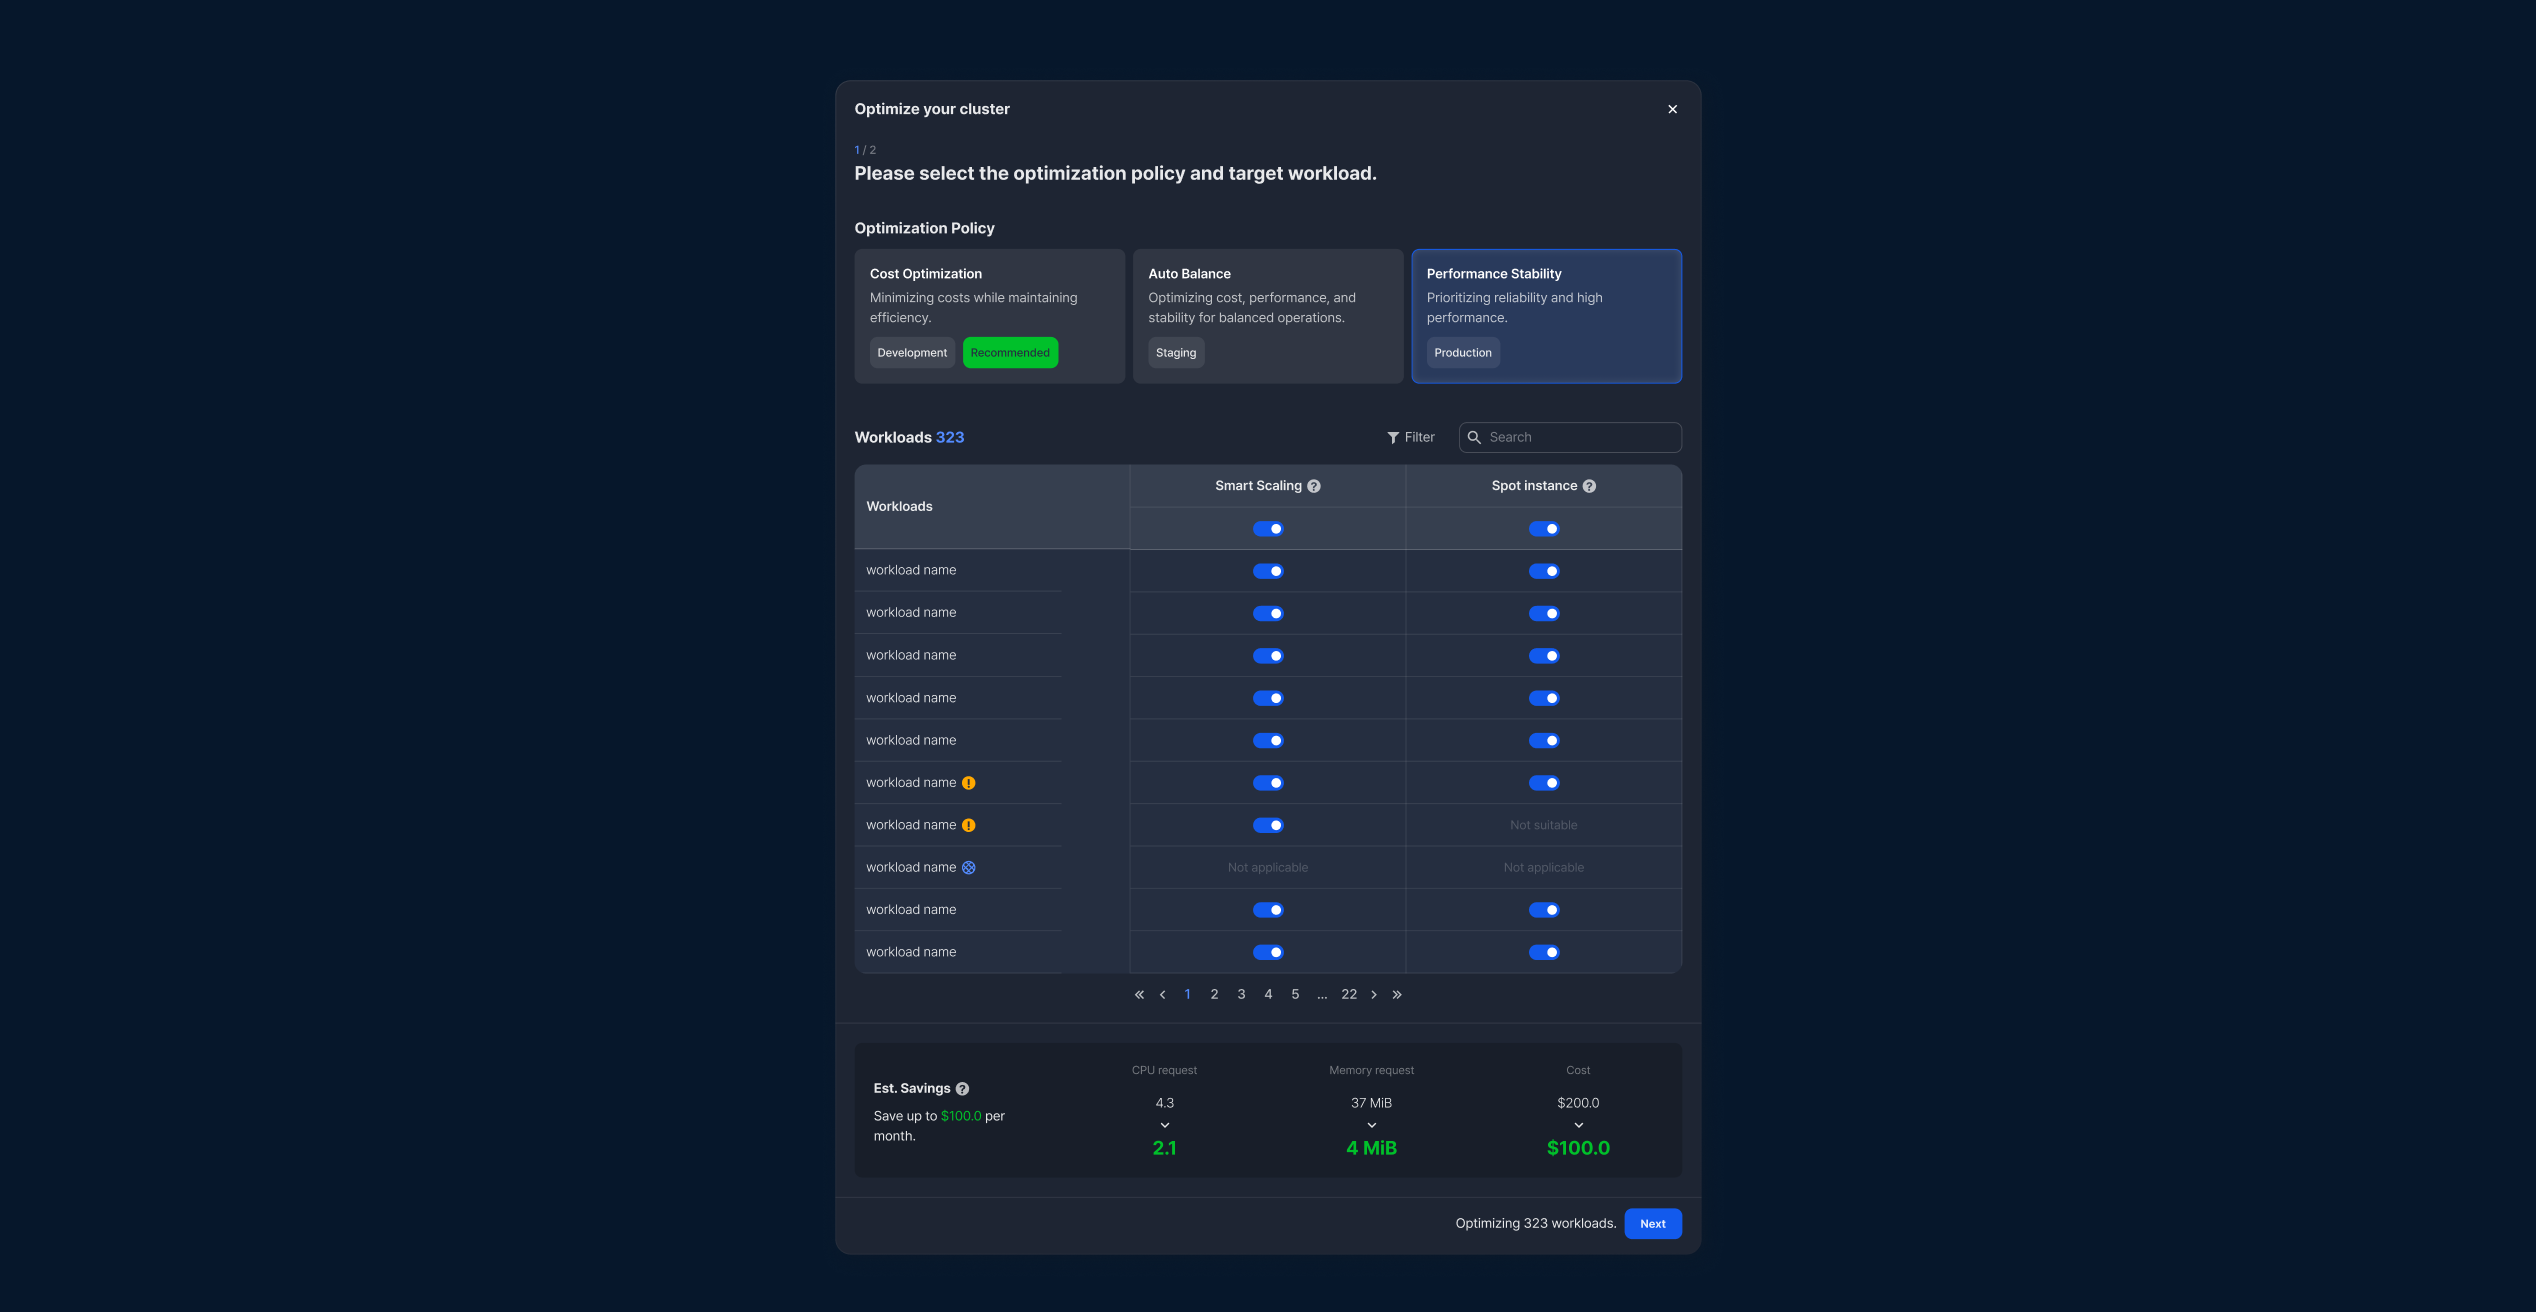
Step 2. Set Policies and Target Workloads
Select the recommended optimization policies based on your environment,
and choose the workloads to which optimization will be applied. You can check the expected resource and cost savings at the bottom.
- Policy selection is available based on the development environment and is recommended according to the environment entered during the initial cluster setup.
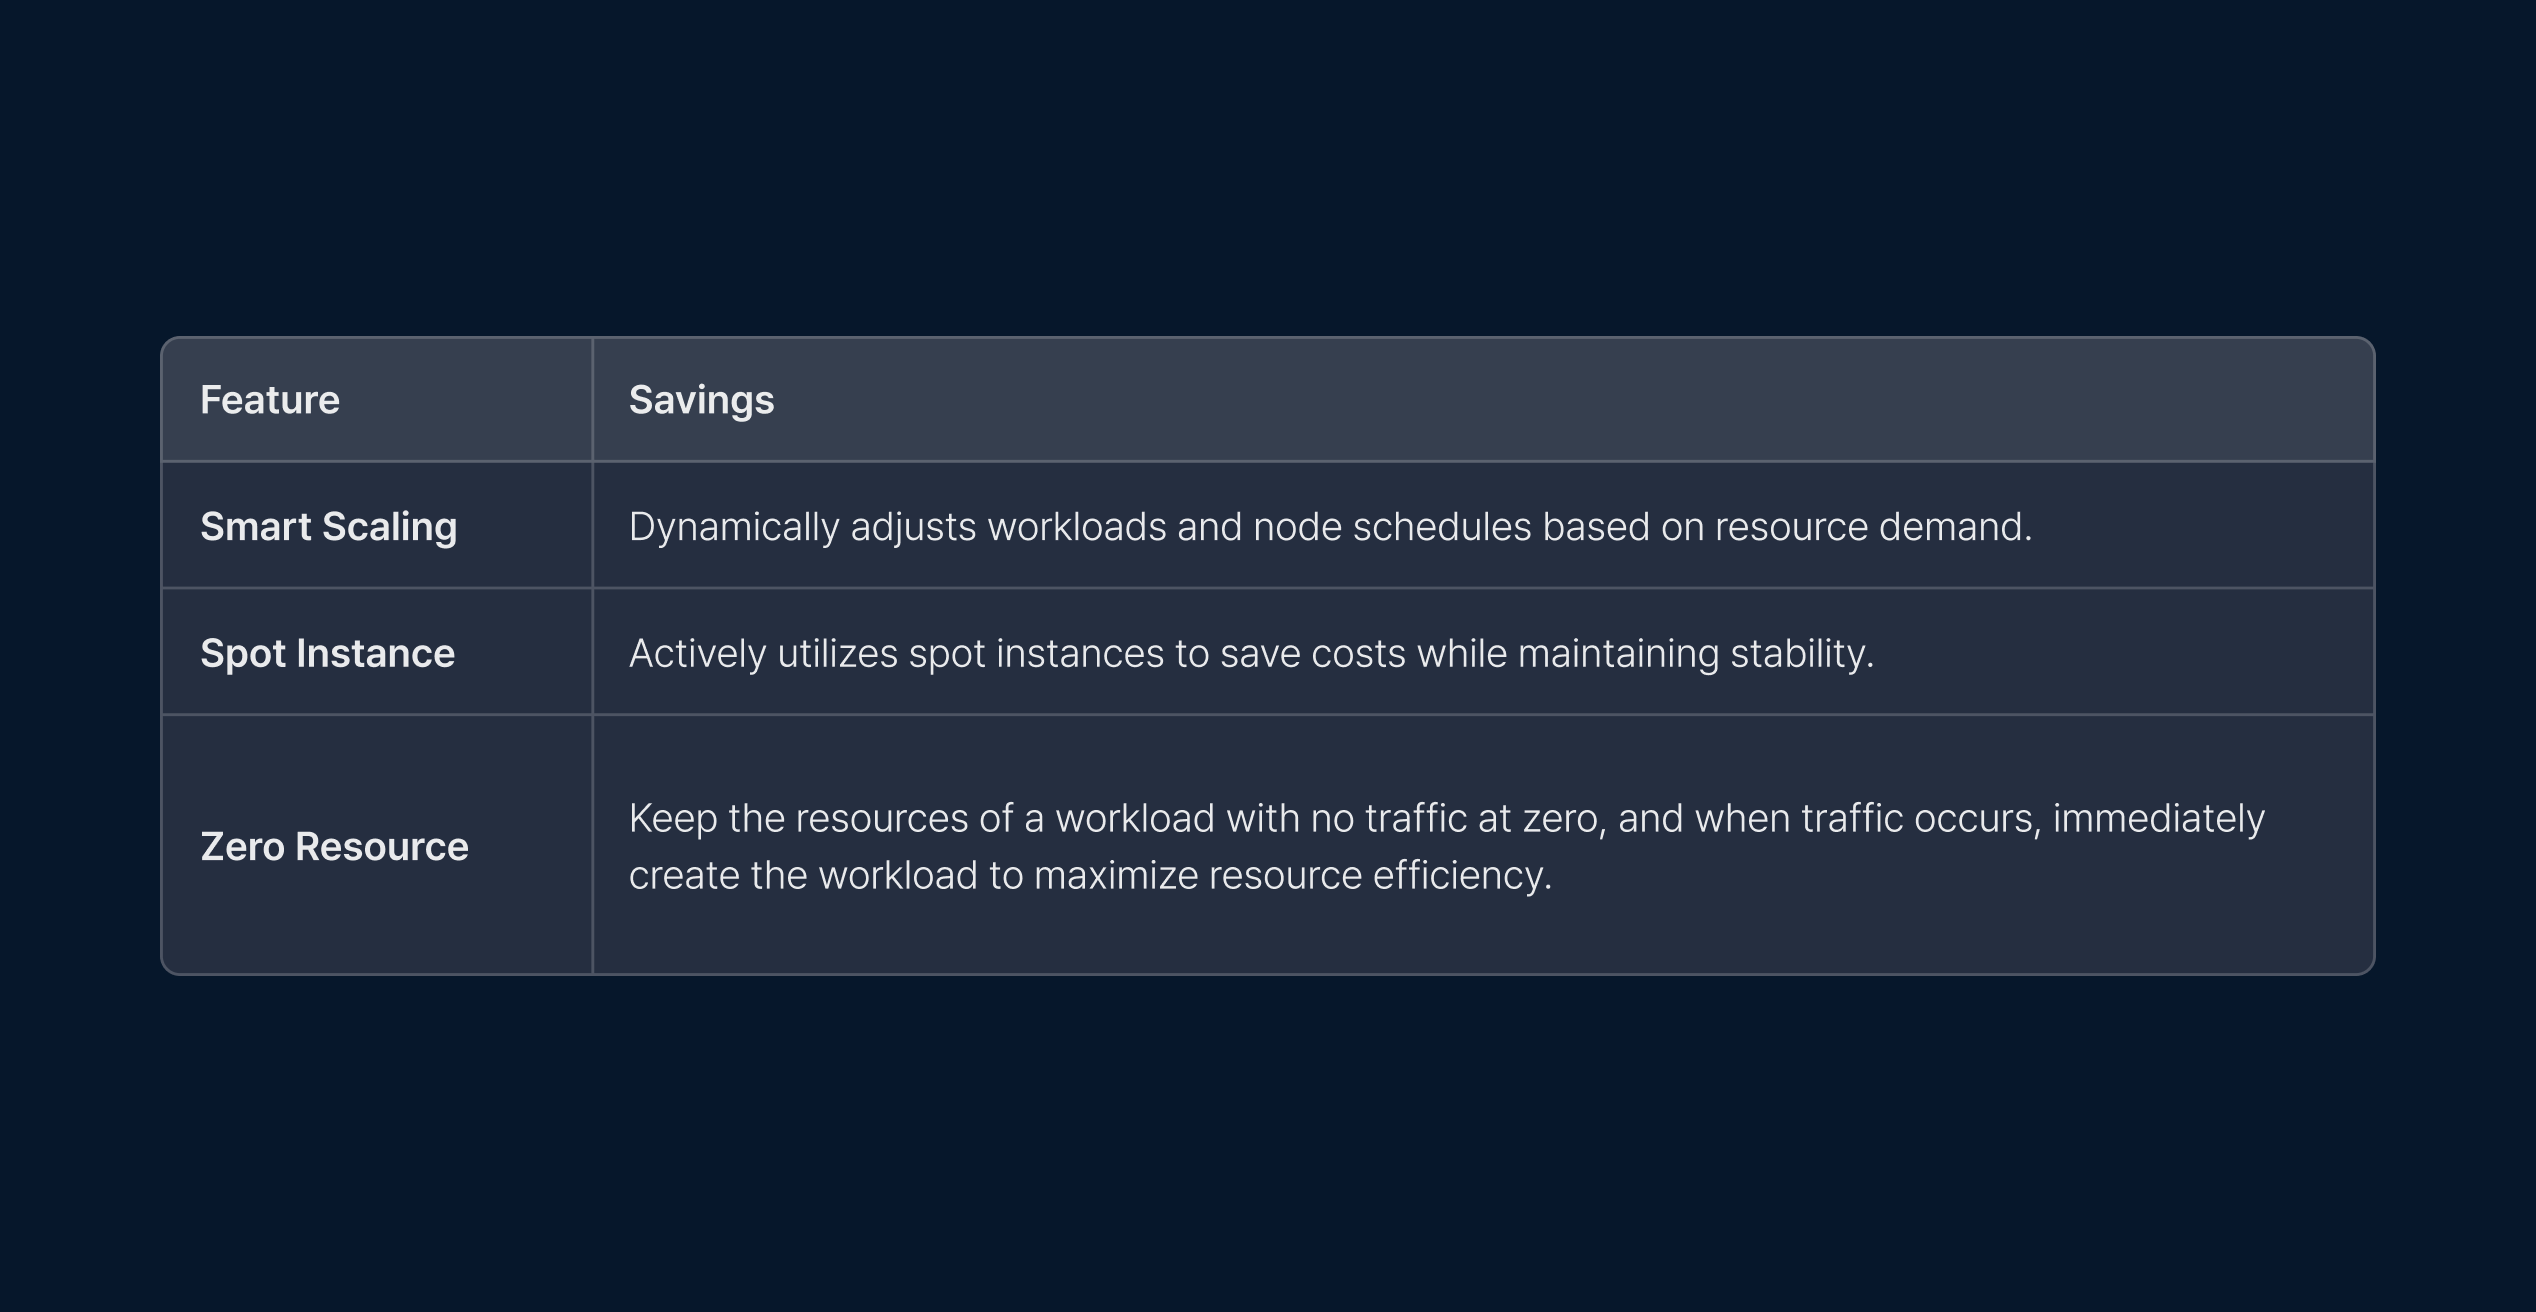
The "zero resource" feature is not available when performance stability is selected. - For each workload, you can freely configure features such as Smart Scaling, Spot Instance, and Zero Resource.
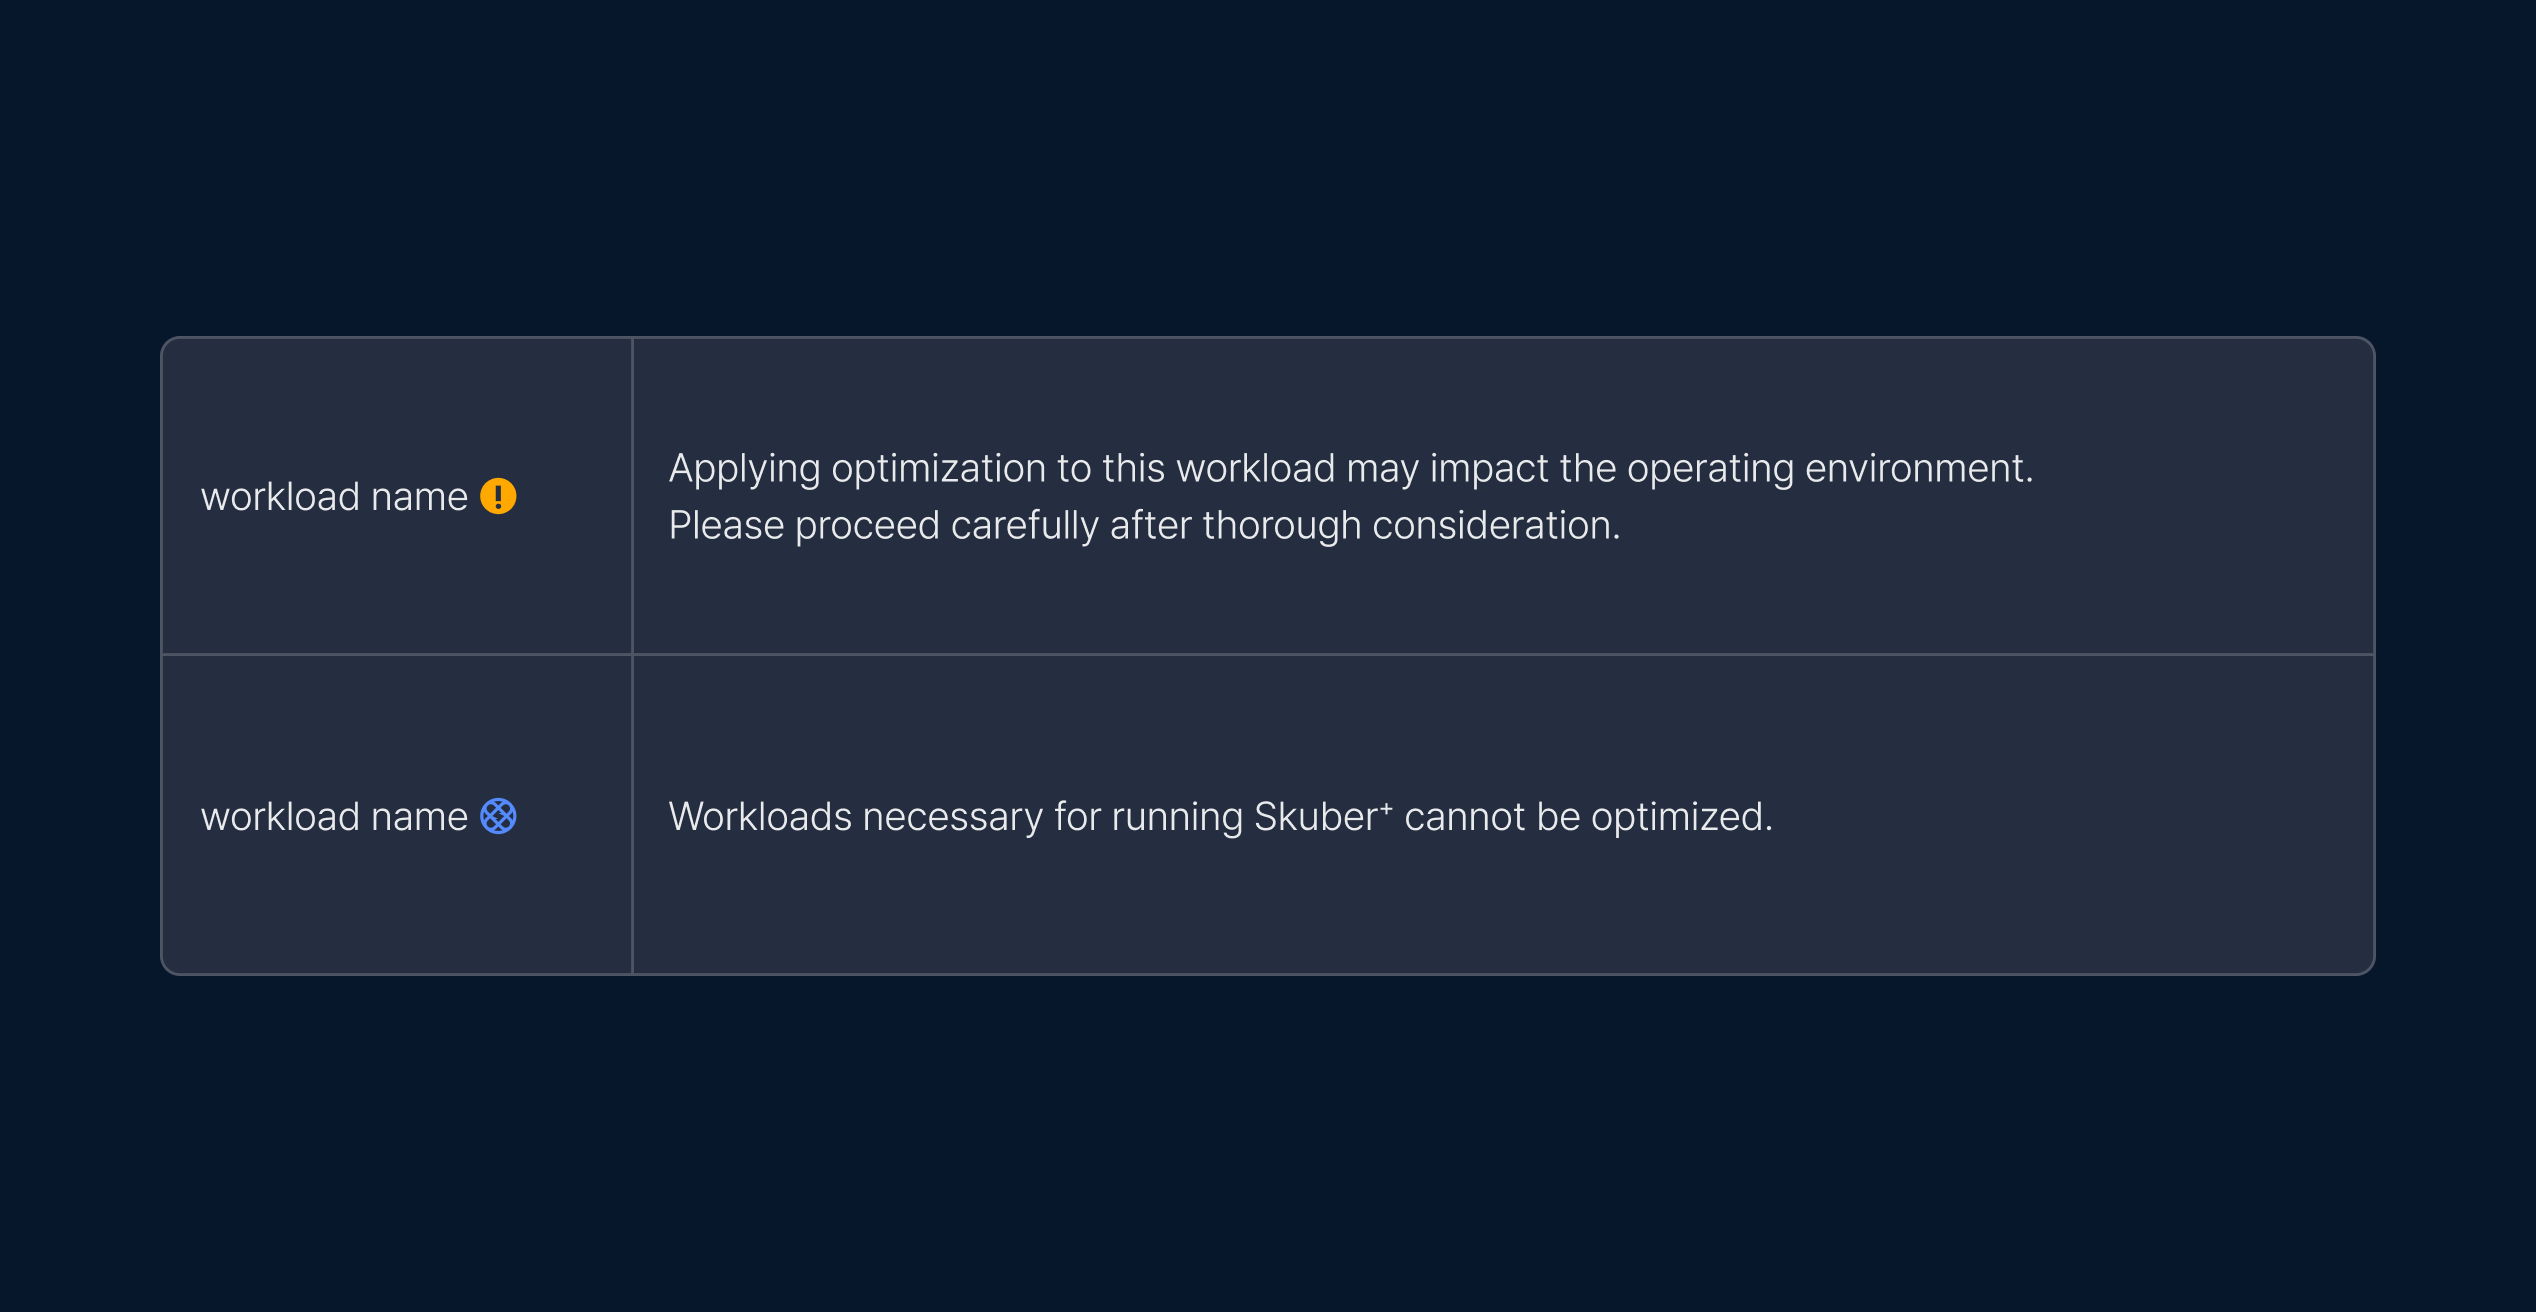
Workloads that require caution will be labeled, and essential workloads for Skuber+ operation will be excluded from optimization.
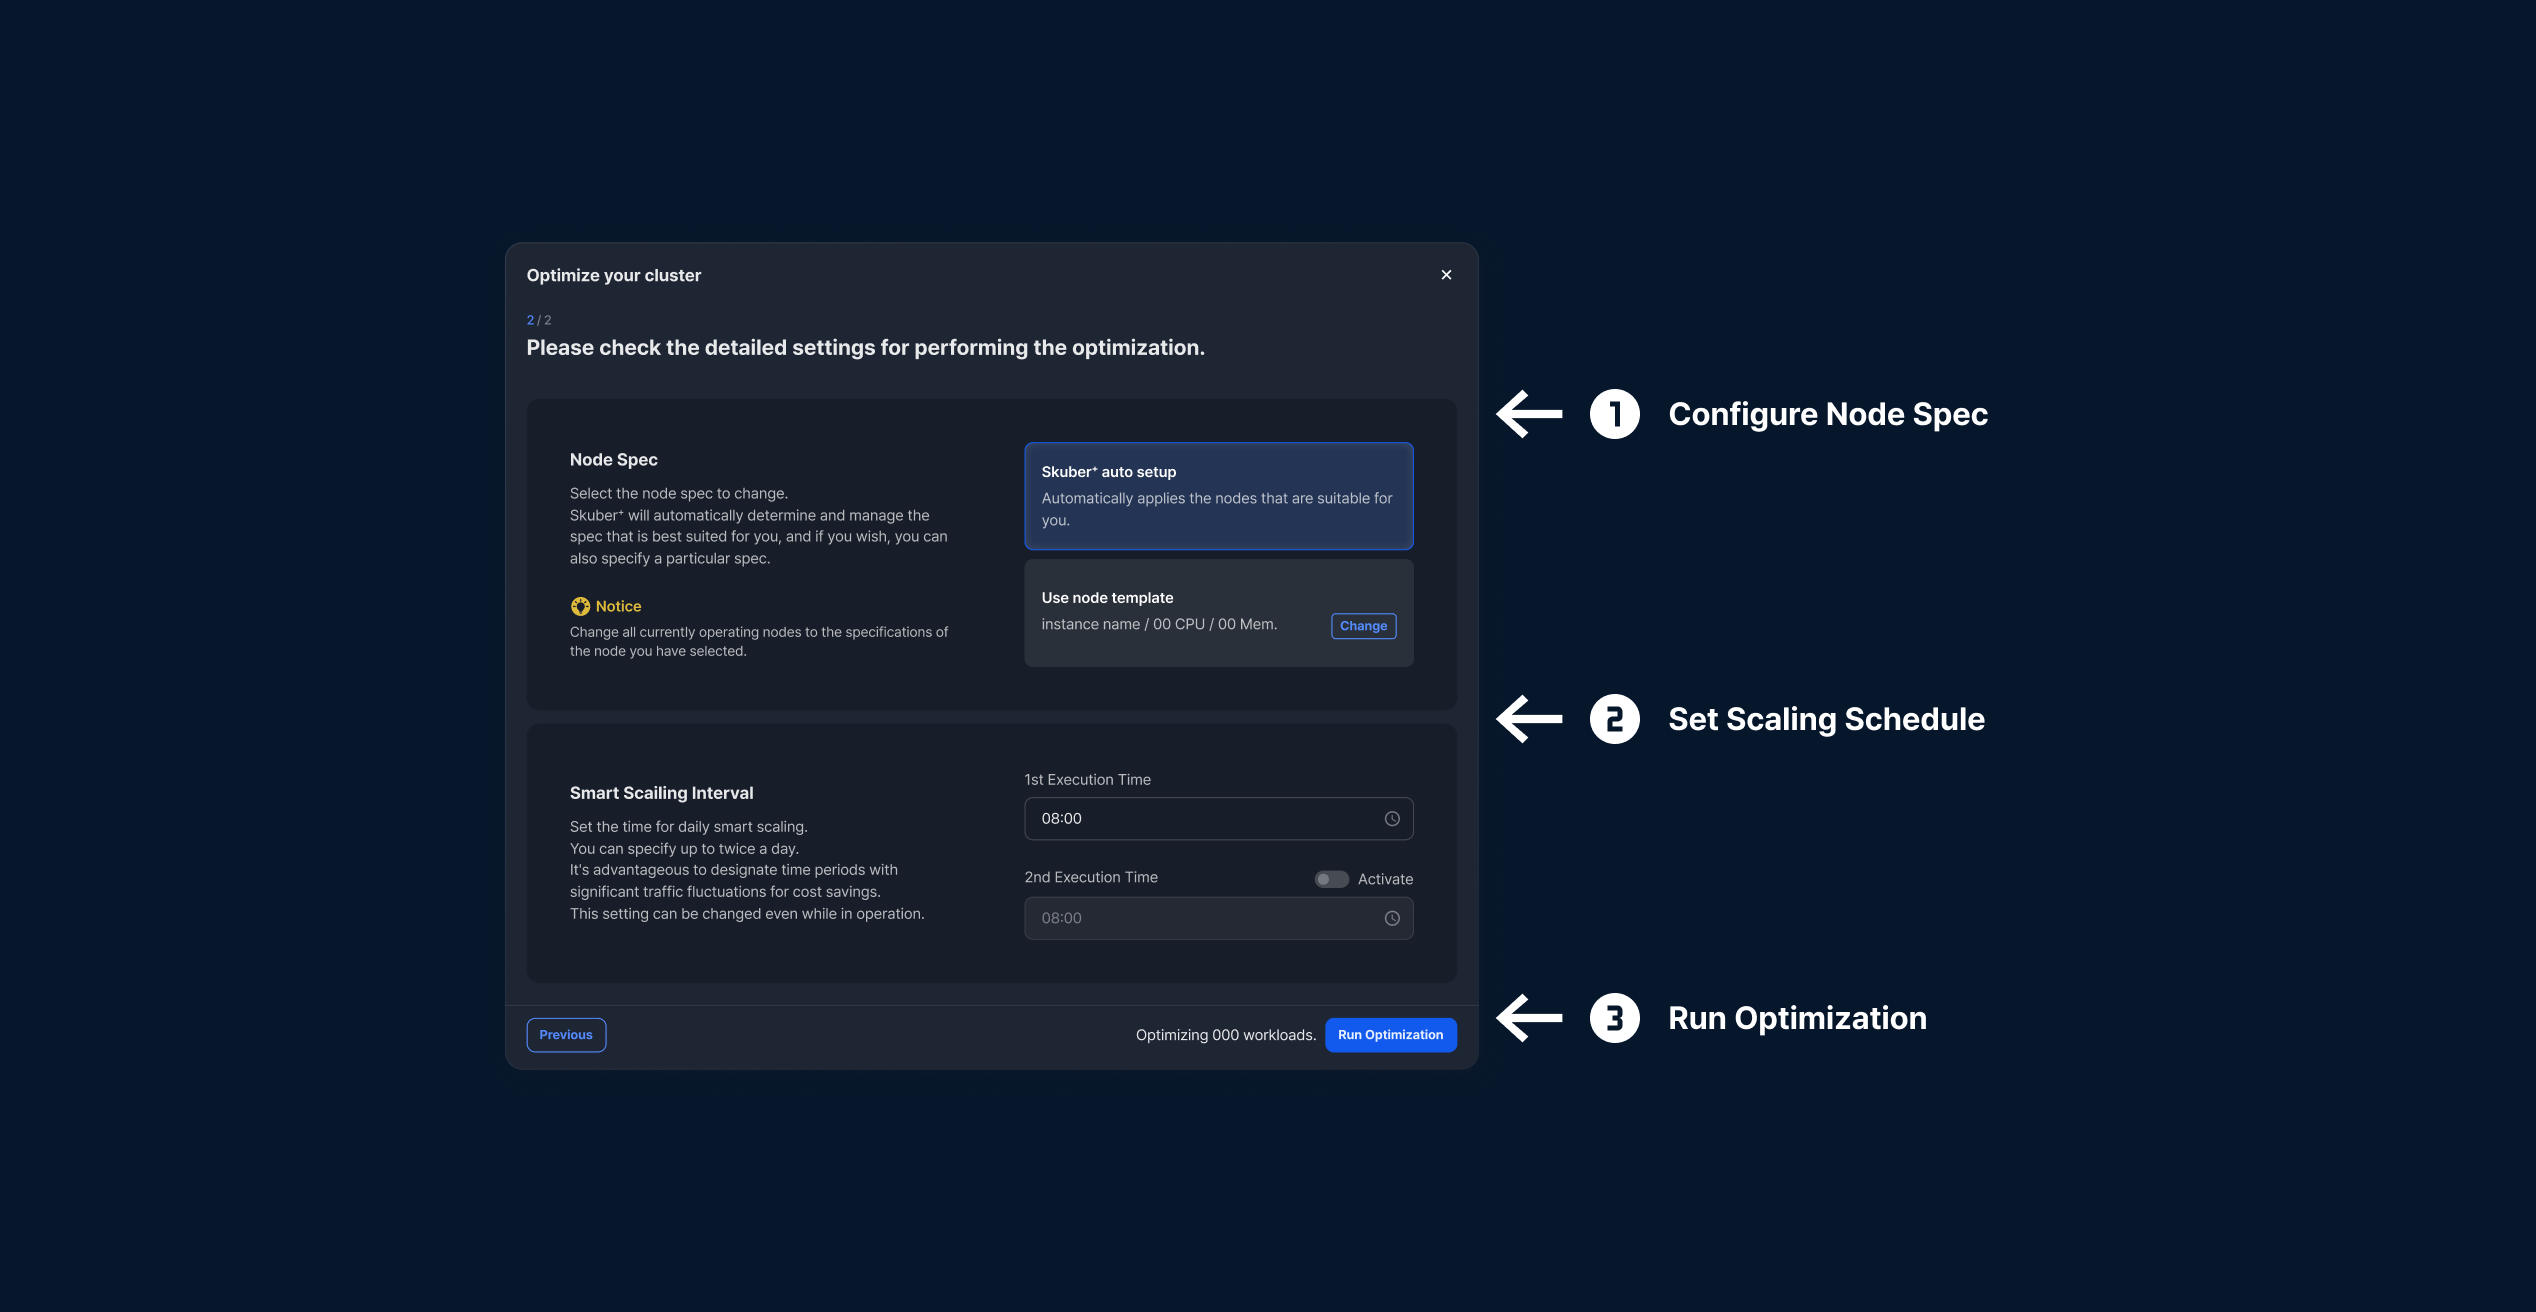
Step 3. Proceed with Detailed Settings
You can freely set node specifications, scaling schedules, and resource schedules.
After configuration, click [Run Optimization] and Skuber+ will automatically execute the optimization.
- Set the node specs to be changed during optimization. You may either apply the recommended specs suggested by Skuber+
or manually select the desired specs. - You can designate up to 2 smart scaling times per day.
Scaling during high traffic fluctuation periods enables more effective cost reduction.
Tip Reduce additional costs by keeping resources at zero during off-business hours.
Cancel Optimization
Clicking will open a confirmation modal and initiate the cancellation process.
Canceling will reset all optimization settings applied to Cluster A. Reconfiguring may lead to increased monthly operational costs.

Skuber⁺ helps you manage and optimize EKS without the hassle.